
Before you ever take a swing, start with the three core fundamentals of G.A.P.
- Grip with proper hand position
- Address – feet position and posture
- Placement of ball
1) Grip: Proper hand position
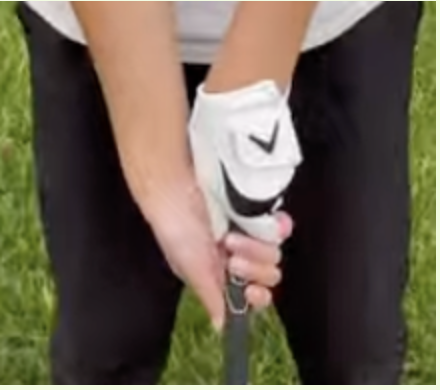
The key to a proper grip is keeping your hands close together so they work as one cohesive unit. Avoid spacing them apart—like holding a hockey stick—as this leads to inconsistent control and poor swing mechanics. (For right-handed golfers: left hand on top, right hand below.)
There are three common hand placements – try each and see what feels best
1. Interlocking Grip
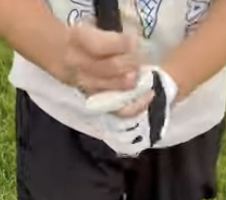
Weave the pinky and index fingers of your lower and upper hands together. This style is preferred by most golfers
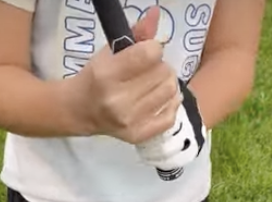
2. Overlapping Grip
Place the pinky finger of your lower hand over the index finger of your top hand
3. Baseball Grip
If the other grips feel uncomfortable, simply press your hands together. Good option for beginners and younger golfers getting used to the motion
Once you’ve found a comfortable way to connect your hands, let them hang naturally—this will put you in a solid, “neutral” grip. If you’d like to experiment with how hand position affects ball flight, there are three grip variations to explore
✅ Neutral Grip
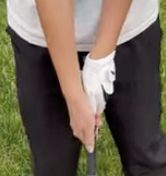
Let your arms dangle naturally at your sides, then bring your hands together around the club. This is my favorite!
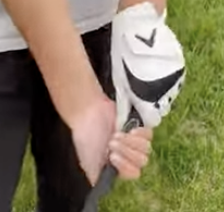
✅ Strong Grip (Good for kids)
Rotate your hands slightly to the right (for righties), so the top of the glove on your left hand is more visible. This gives more control when you don’t have the strength to properly close the club face on impact
❌ Weak Grip (Not recommended)
Rotate your hands the opposite direction (to the left for righties), exposing of your non-glove hand. However, if your timing not perfect, it will likely cause more slices
Ball flight: It’s important to know the basic terminology for how the ball moves.
It’s fine for the ball to be moving slightly right (fade) or left (draw); however, when it gets to be more severe, you’ll want to make some corrections.
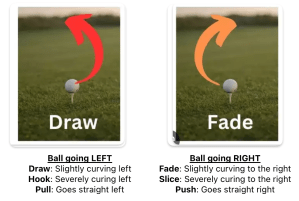
A fade will typically have a higher ball flight and land softer with less roll, where a draw will typically have a lower ball flight, have more roll, and generate more distance.
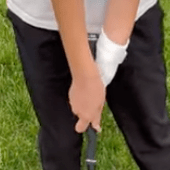
2) Address with feet and posture
Your stance sets the tone for your entire swing – it should be balanced, allowing you to shift weight and rotate your body
- Feet: Shoulder-width apart
- Weight: Evenly balanced between both feet, with a slight lean forward toward the balls of your feet
- Posture: Imagine sitting on the edge of a stool—back straight, knees slightly bent
- Hands: Hands should be under the chin. With a proper stance, your arms will hang naturally so that your hands fall in line with your chin.
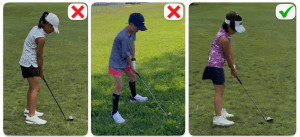
(Left) Back is rounded, club too close
(Middle) Feet too far apart
(Right) Back straight, knees slightly bent, and hand naturally fall under the chin
The space between your hands and your pelvis is key—aim to keep about one fist’s width of distance. This helps set up the correct swing path, or swing plane, for a more consistent shot.
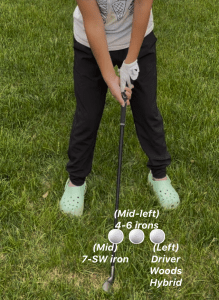
3) Placement of the ball
Ball position is the final step in your setup —different clubs require different ball positions, which directly impacts your contact point and ball flight.
Driver/woods/hybrids: The ball should be positioned towards your left foot. This helps create the proper club angle at impact to help get the ball in the air.
Irons (7 iron through sand wedge), the ball should be position in the middle of your stance. If you’re hitting anything lower than a 7 iron, place it 1 ball position closer to the left side – again, this is to help get the ball in the air.
(Tee Height: Tee the ball high enough so that half the ball sits above the top of the clubface)
You’re now ready to swing the club!
